Carving isn’t just a flashy skill for advanced riders — it’s a fundamental technique that can completely transform your ride. Whether you’re cruising groomers or tackling more technical terrain, mastering your carving technique gives you better control, smoother flow, and more confidence in every turn.
In this guide, we’ll break down the carving process into five clear steps that help you make real, lasting progress. From edge control to body positioning, each step is designed to teach you not just how to carve, but how to carve better.
If you’ve been struggling with clean lines or want to move beyond skidding turns, this guide is perfect for you.
Let’s dive in — and get you carving like never before.
This article was made possible thanks to my friend, Sigmund Chan (CASI Level 3 Instructor).
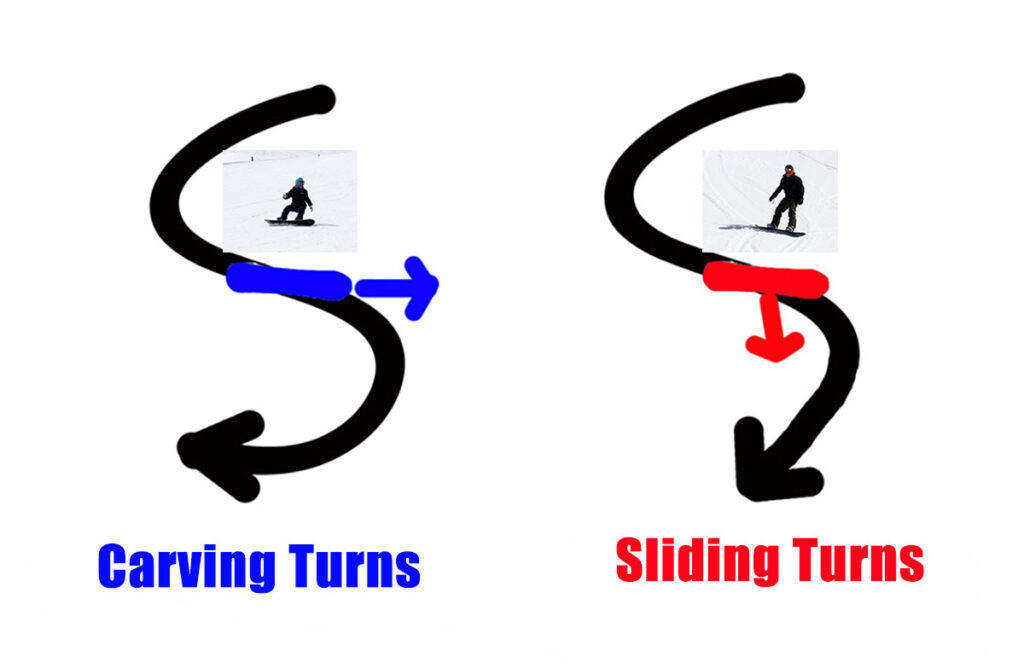
What is the difference between carving and sliding?
How can you tell if your turn is a “carving” turn or a “sliding” turn?
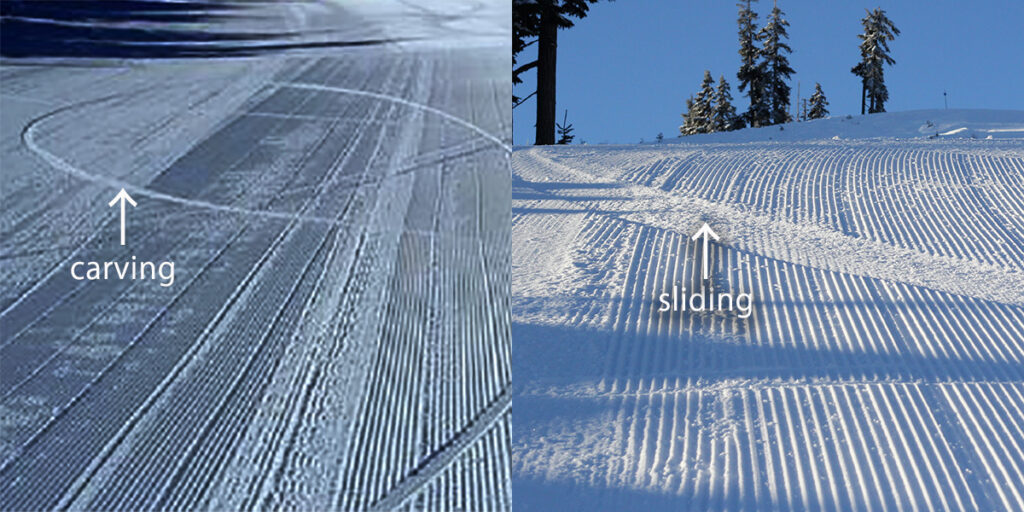
One way to check is by looking at your track marks.
If your tracks are thin and look like a single line, you’re carving.
Sliding turns, on the other hand, leave wider, crescent-shaped marks in the snow.
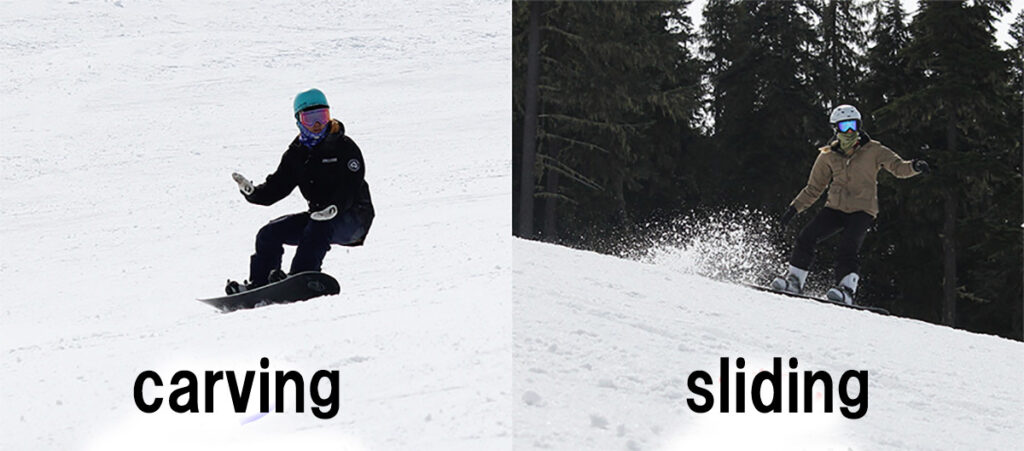
Another way is to observe the snow spray.
In a skidded (sliding) turn, you’ll see a spray of snow coming off the board.
In contrast, a carving turn leaves almost no spray, as the edge cuts cleanly through the snow.
You can also listen.
A carving turn is almost silent, while a sliding turn makes a scraping sound.
Choose a gentle slope that’s easy to practice on!
While carving turns are often associated with advanced techniques, choosing the right slope is key to mastering them.
I recommend starting on gentle slopes rather than intermediate or advanced ones.
Look for a quiet area with good snow conditions, and ideally, aim for freshly groomed snow in the morning for the best practice conditions.

Good Posture for Better Snowboarding
If you’re aiming to master carving turns, you might already have an idea of how to position yourself on the board. However, in the 9 Tips for the first day of snowboarding for beginners, I didn’t cover the correct stance in detail, so let me explain it here. A good posture is beneficial for all types of riding!
In this section, I’ll walk you through a few steps to help you achieve a smoother and more controlled ride.
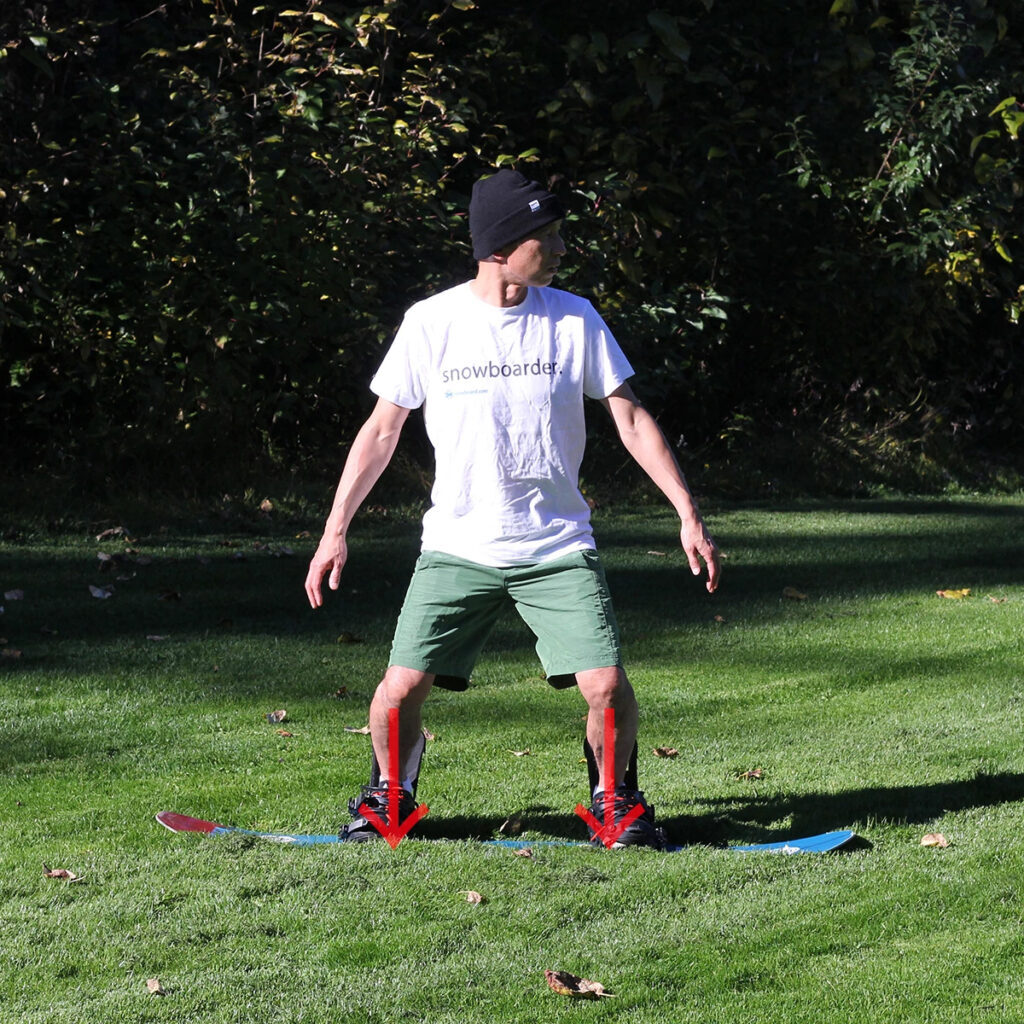
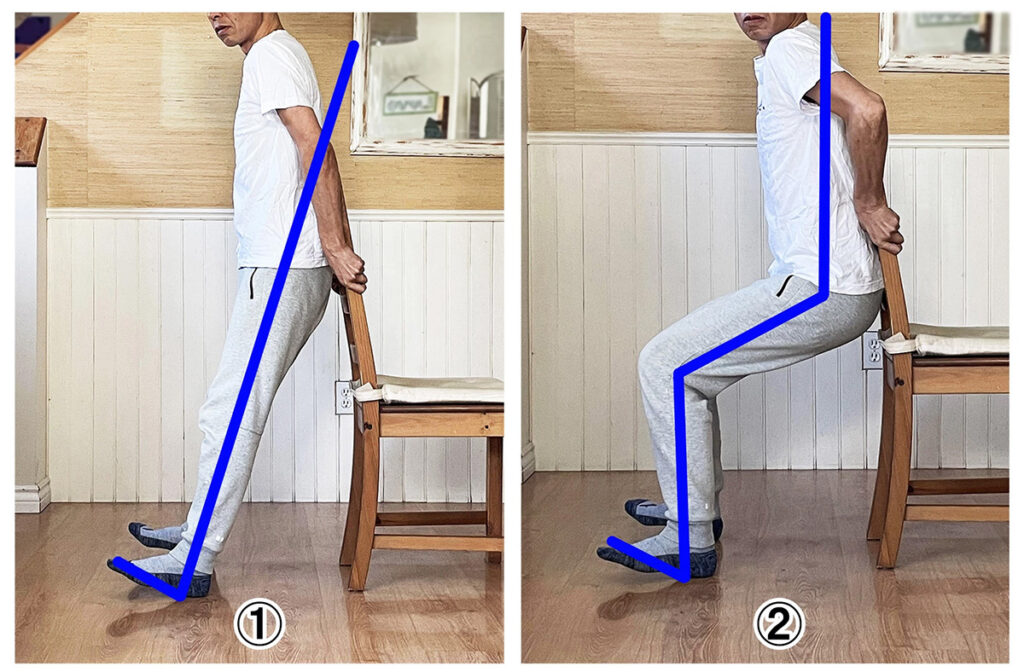
Step 1: Stand directly above the board.
Next, turn towards where you want to go. Your neck should twist to follow your intended direction.
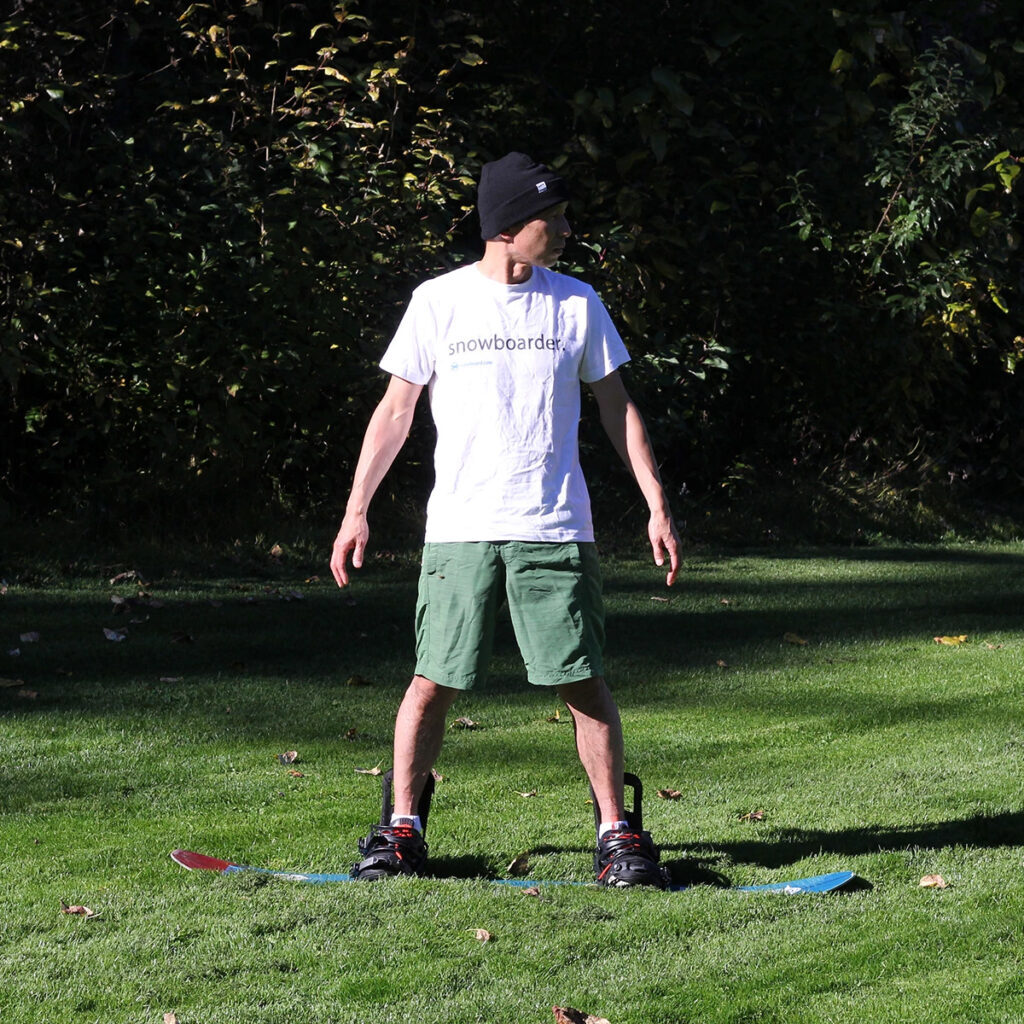
This image represents “Yakitori” (Chicken Kebab). Imagine your head being placed on a skewer, as if you were part of the kebab. This will help you find a good center of balance, creating a stable, fixed posture that will make your transitions much smoother.
Step 2: Find your neutral position.
After following the initial steps, you’ll reach your neutral position. Now, let’s focus on your arms. Spread them out to line up with your waist to help with balance.
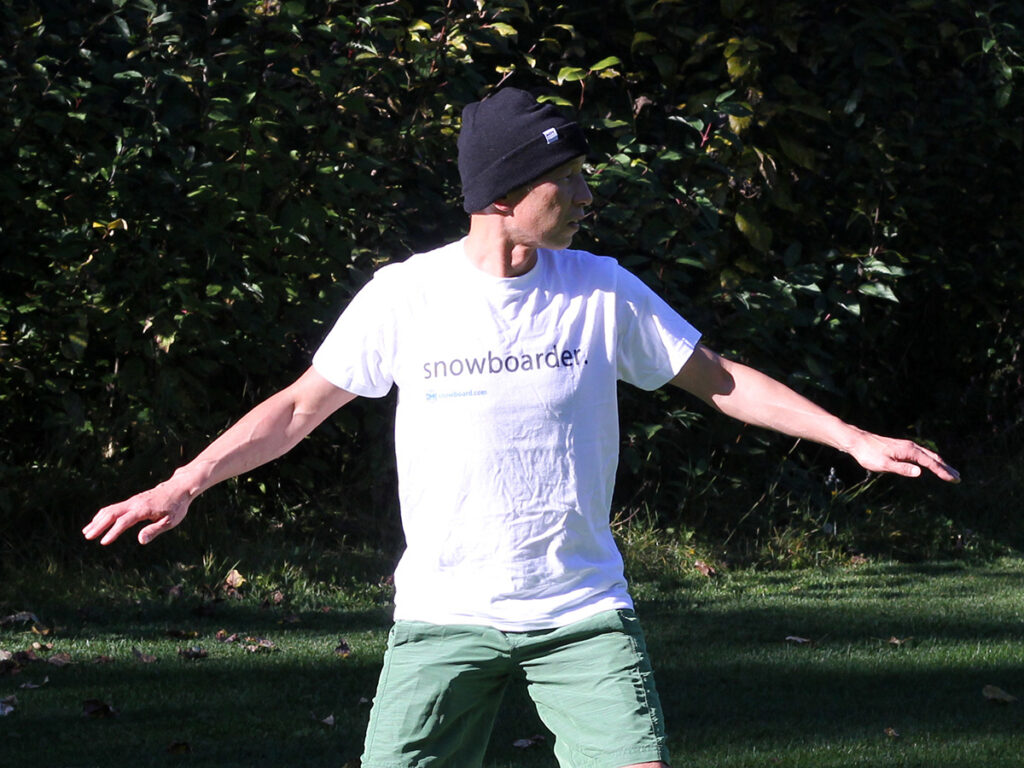
If you slightly raise your arms, as shown in the image above, it will assist with balance. However, avoid raising them too high, as that can make you feel unbalanced. It’s all about finding that perfect in-between position.
Relax your upper body while bracing your lower half.
Tip for Balance:
Try keeping your hands in your pockets while riding to practice balance. But be careful if you try this!
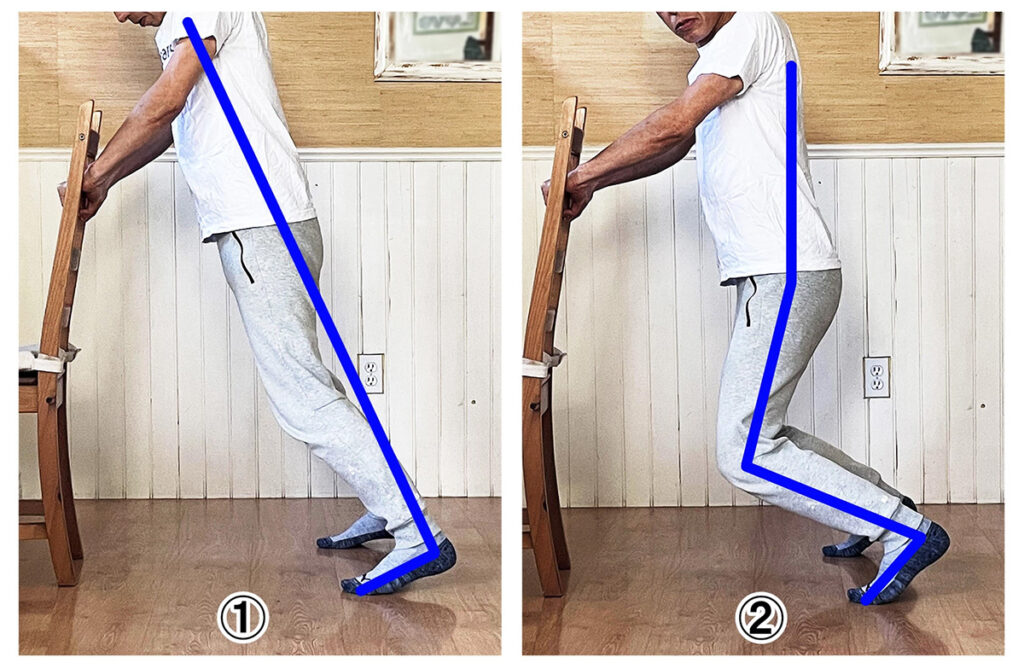
Step 3: Adjust your upper body position.
Turn your upper body slightly forward. Many people think their front binding should be directly facing forward, but it actually sits at a slight angle towards the nose of the board. Twist your hips towards where your first foot is angled. This subtle motion can greatly improve your balance.
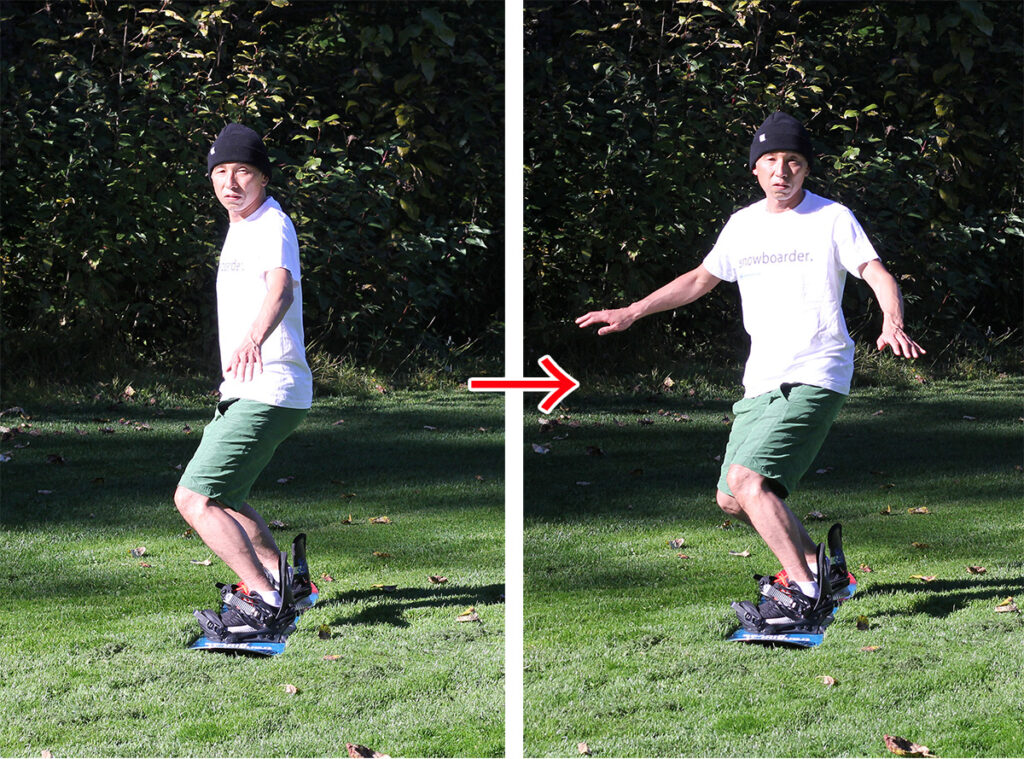
In the images shown above, technically, both positions are correct. However, I recommend the second position, as it offers better balance, especially when you’re picking up speed. Just be sure not to over-twist! While the twisting posture in your upper body is helpful, remember to bend your knees. Otherwise, you could end up steering in the wrong direction.
This basic posture can also be practiced in front of a mirror at home. Give it a try!
STEP 1: How can you adjust the edge angle you need for a carving turn?
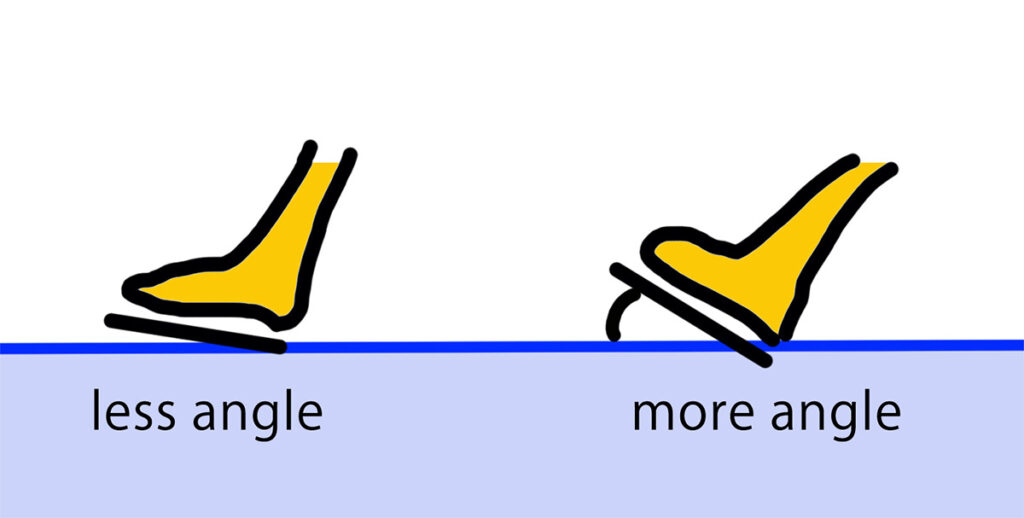
The first step to making a carving turn begins with understanding how you can adjust your angle of the board, i.e. on your heel side, you can fine tune your edge angle using your ankles.
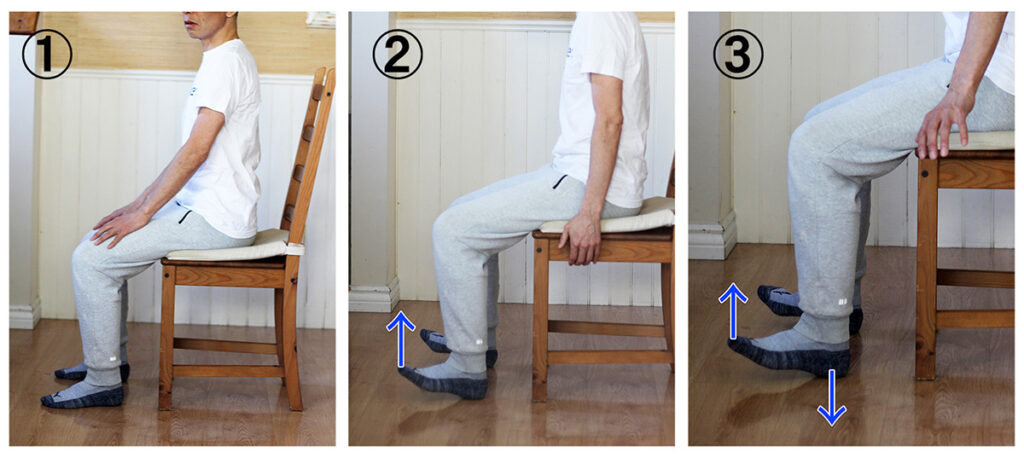
If you are in the house or office,
① Please relax and sit in a chair first.
② Then lift up your toe and you can edge on the heel side.
③ Press the heel against the ground.
Now you have more powerful edging on the heel side.
Let’s do it on both on the heel side and the toe side while standing.
①First, use a chair to balance yourself, raise your toes and lean your back.
You can start edging just by doing this.
However, this is slightly unstable.
② So try to push your heels against the ground with your knees bent while keep your toes up.
Next, let’s do the same with your toes.
①Lean your body to the side and lift up your heels.
②It is unstable if you just tilt down, so bend your knees and ankles firmly. The point is to make it feel like you’re pressing your shins towards the snow.
More angle = More carving turn!
In order to make a carving turn, it is necessary to have more edge angle for the snowboard.
If the edge angle is low, it is difficult to make a carving turn. Try to increase the angle to make a carving turn.
In this step, please make sure you understand what you need for carving and how to angle the board to achieve a carving turn. Then let’s go to the next step!
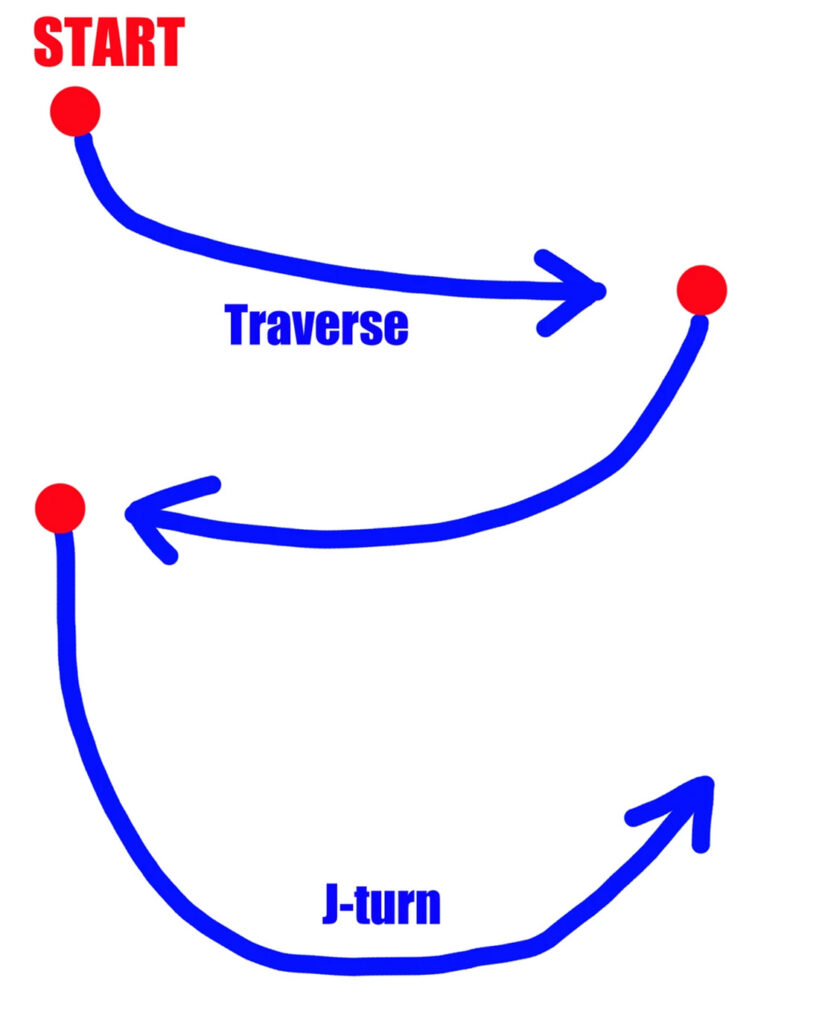
STEP 2: Let’s traverse and get a feeling of strong edging
In order to traverse you need to go a little downhill in order to accumulate speed, then begin to traverse across the slope.
Note: Be sure to check for skiers and snowboarders coming from above before going traversing.
①First, gain speed by going down the slope.
②Lift your toes towards your chest to get a strong heel side edge. Don’t forget to bend your knees and keep your body upright.
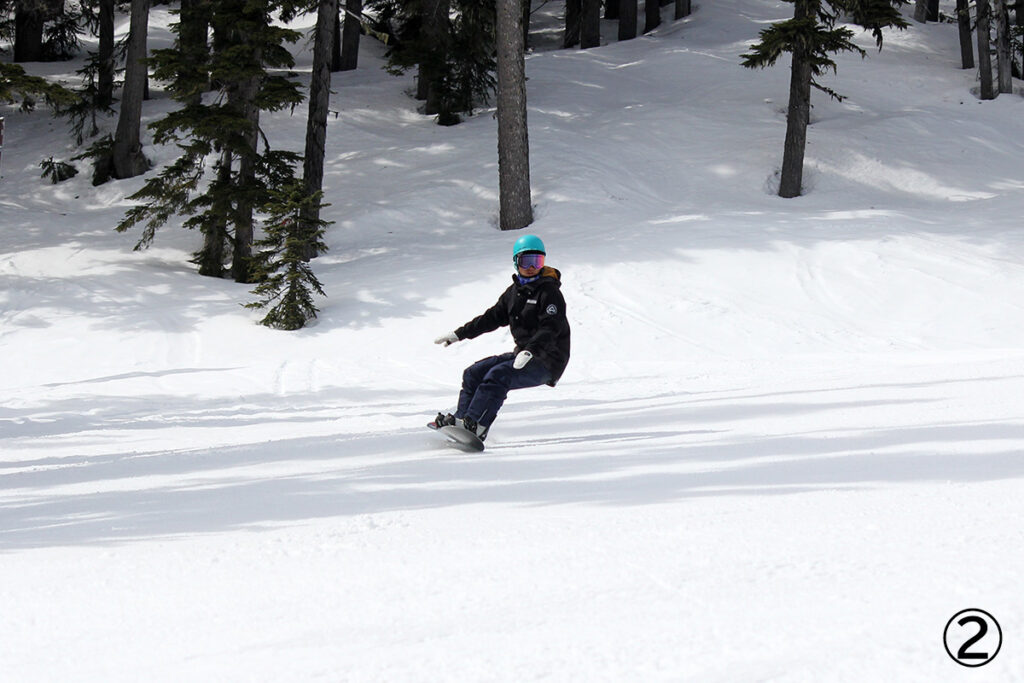
③Look in the direction you want to go.
④At the end, aim for the side of the run, like you’re about to go back up the slope slightly.

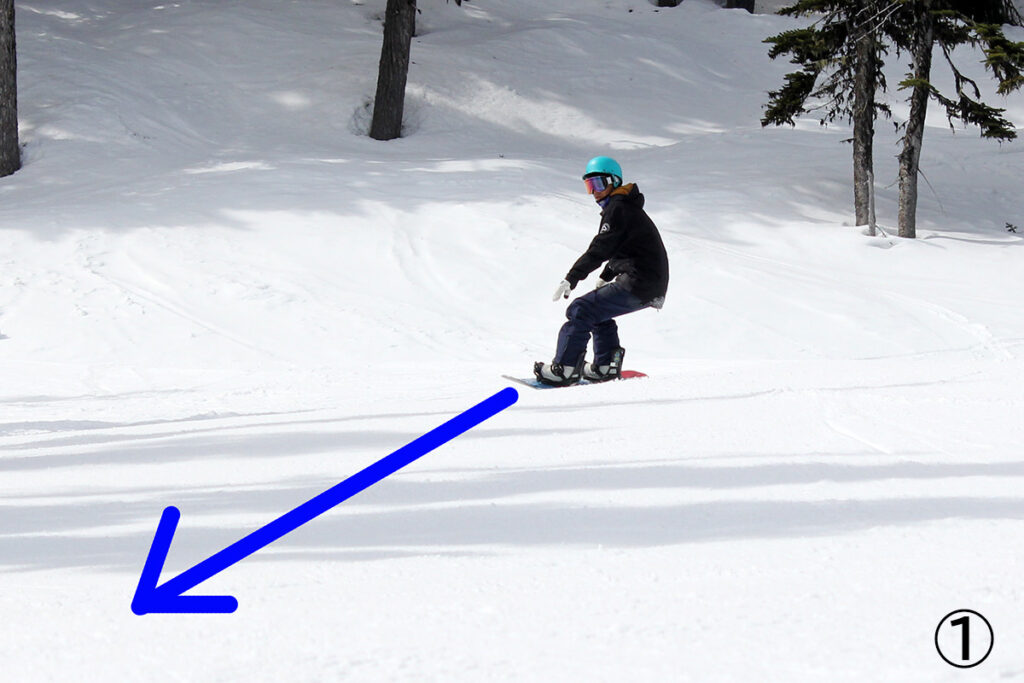
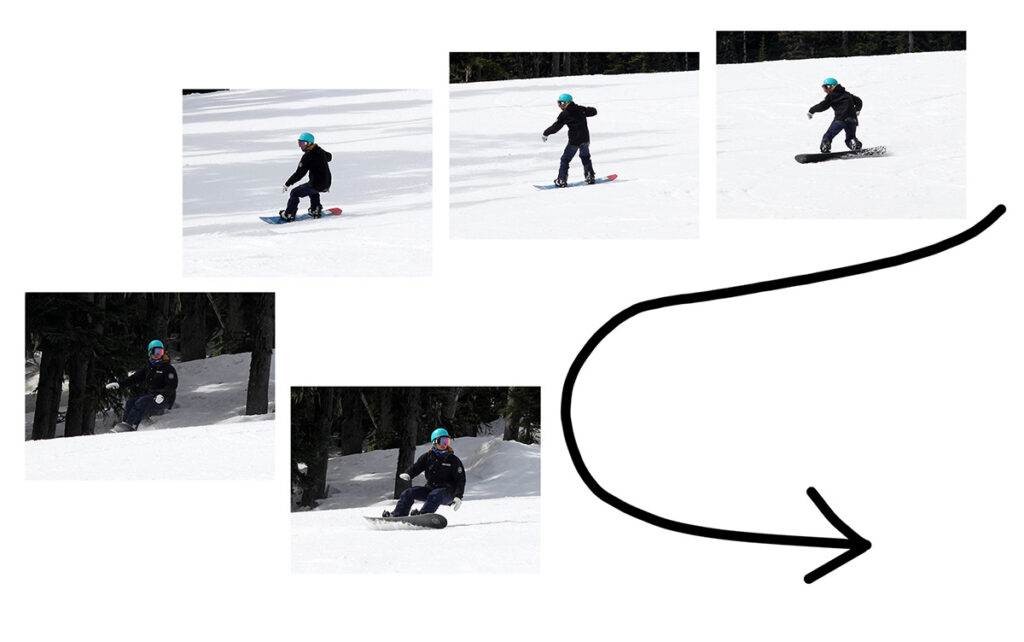
A common mistake is to have your hips back and the upper body leaning forward. You want your upper body straight like the blue line in the image below.
Now let’s traverse on the toe side!

1) Your body might lean inward and easily fall onto the slope, make sure to keep your upper body upright.
This upward leaning posture (angulation) stabilizes the turn.
2) Push the knees closer towards the snow and make sure to bend your ankles as well.
By doing this, the knees and ankles will bend firmly, and the edging required for carving will come more easily.
STEP 3 Think about the side-cut on the J-turn
Once you can draw a pencil line on the traverse, it is time to try the J-turn.
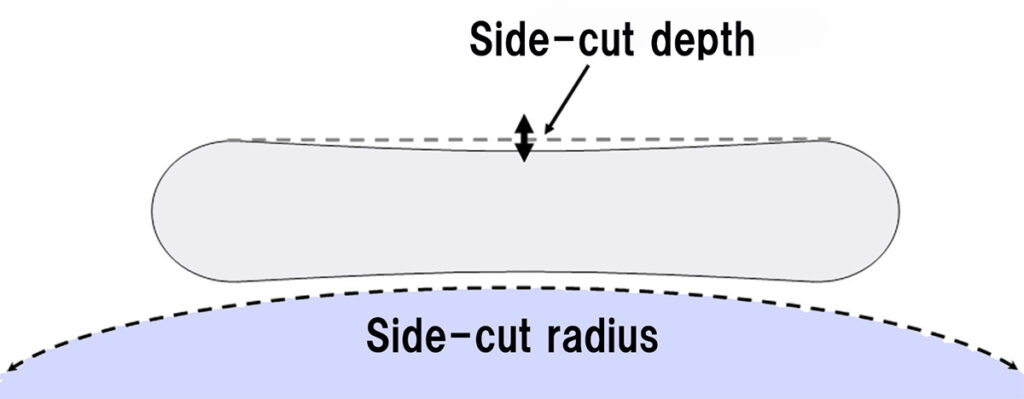
In order to make a J-turn, you need to think about the side-cut on the board. The side-cut on a snowboard is essentially the curve along the side of the board. Every snowboard has an arc along the side and this is known as the side-cut.
Snowboards have side-cuts that allow you to turn with a little edging and weight.
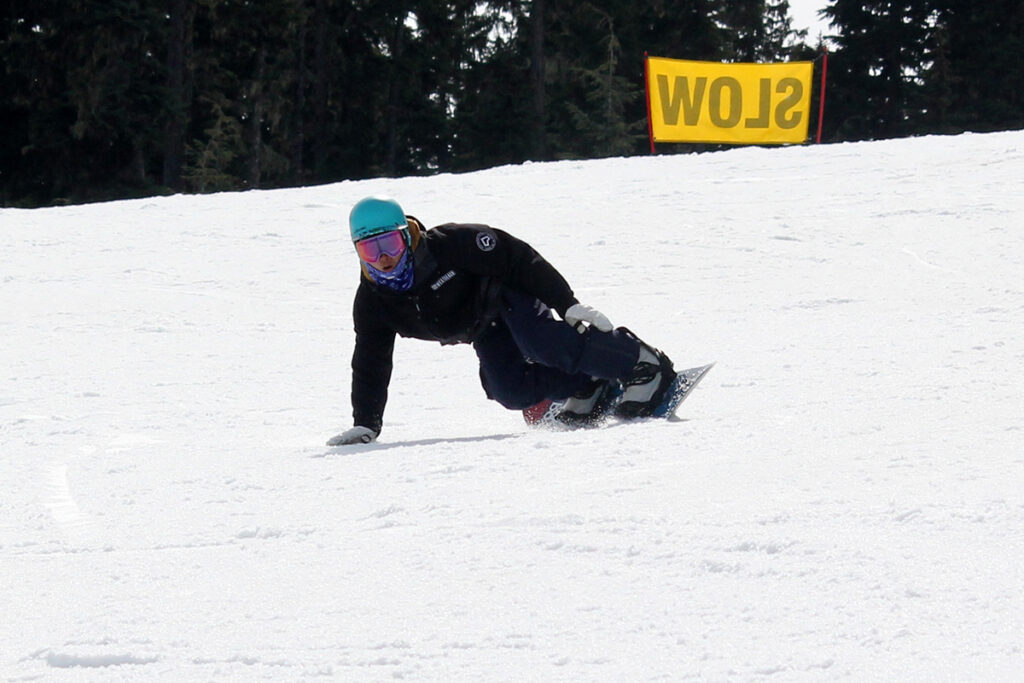
On carving turns, patience while holding down the edge is important (do not rush your turns).
When you try J-turns, gradually point your board down the mountain so you can increase your speed. Ultimately, we aim for a turn arc that allows us to draw a J-shape.
The technique required for improving your carving turns.
Please check the following video to help you get a better understanding of the J-turn.
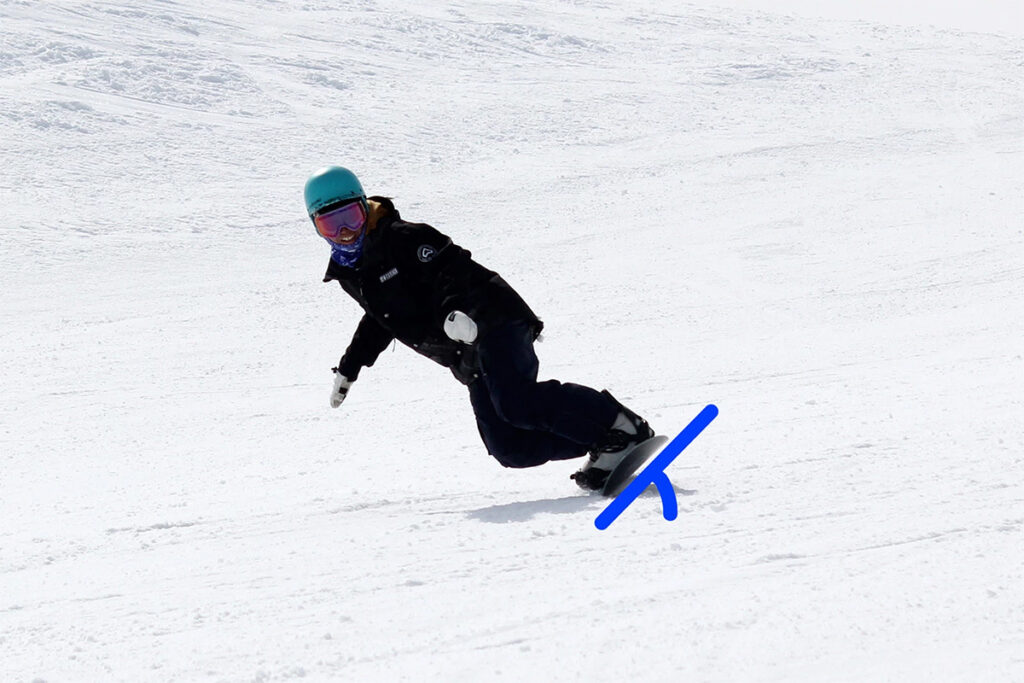
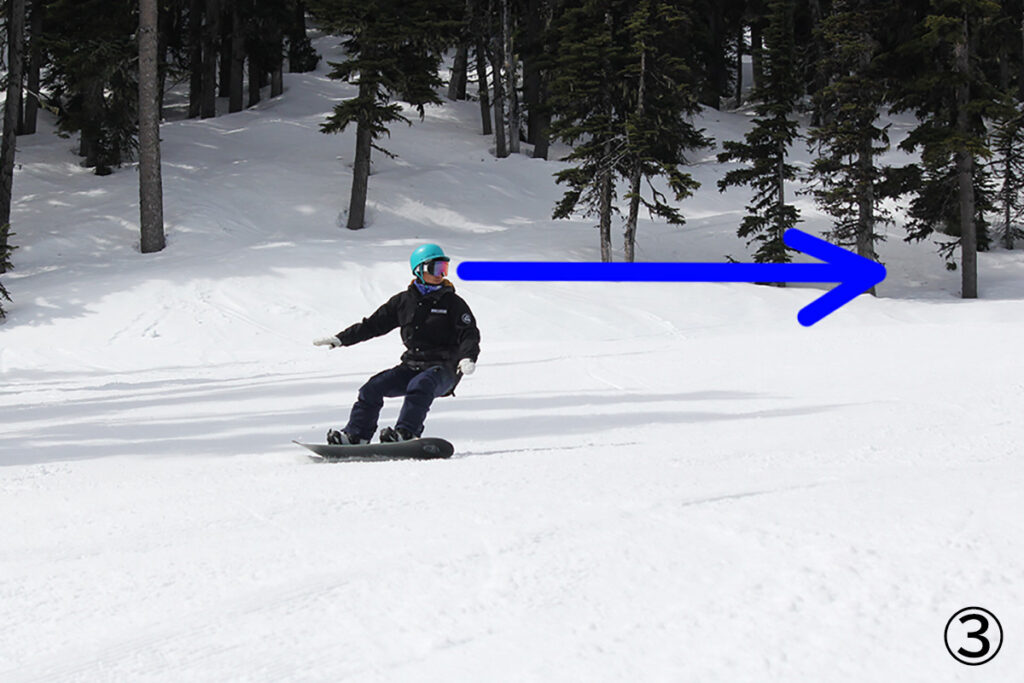
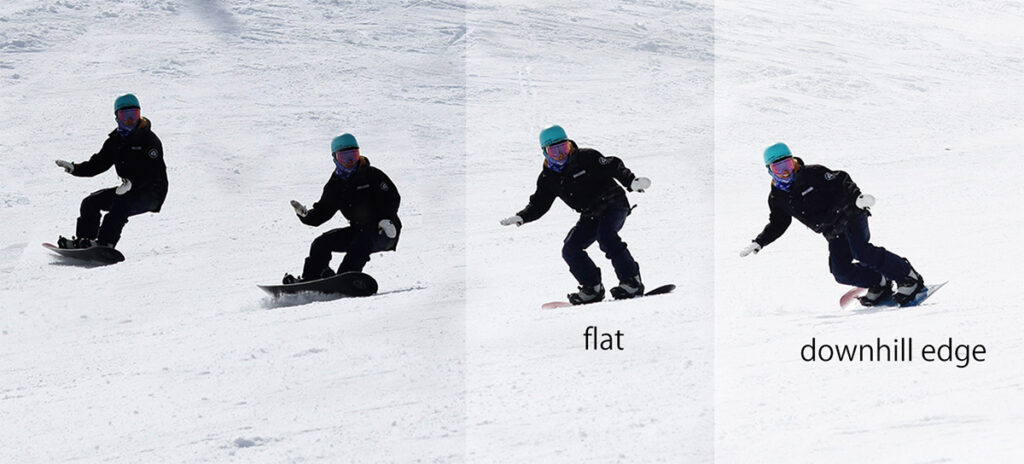
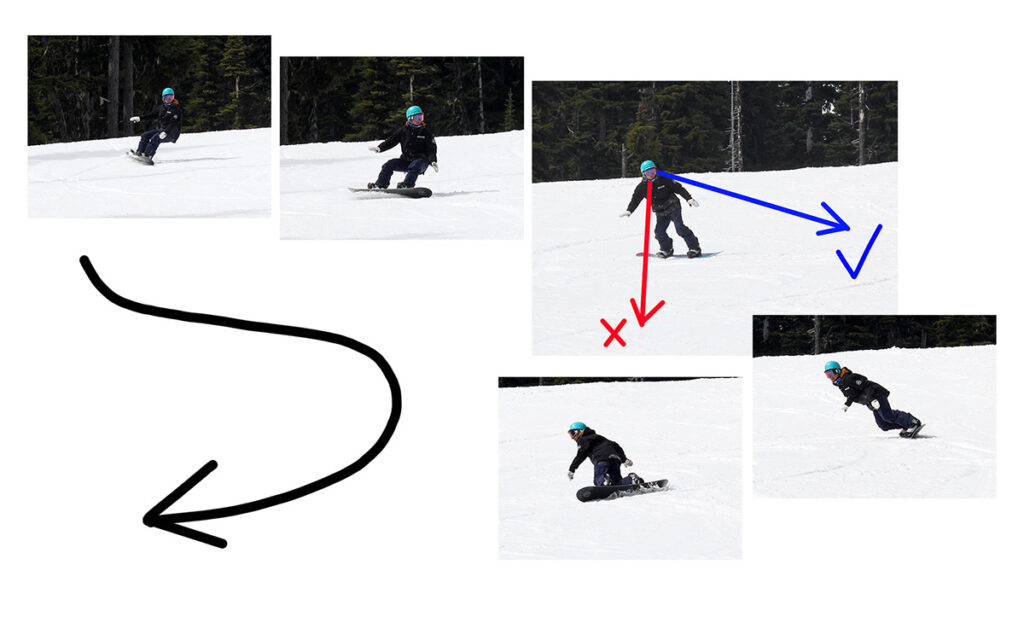
STEP 4 Learning the downhill edging for the C-turn
Edging on the downhill side is important for a complete carving turn. To do a smooth edge transition , practice for edging on the downhill side is important.
In my experience of being a snowboard instructor, for many people, this transition doesn’t work too well and they aren’t able to make a good carving turn.
In other words, edge transitions are the key to a successful carving turn!
A major cause of poor transitions is the inability to move from edge to edge while the board is moving.
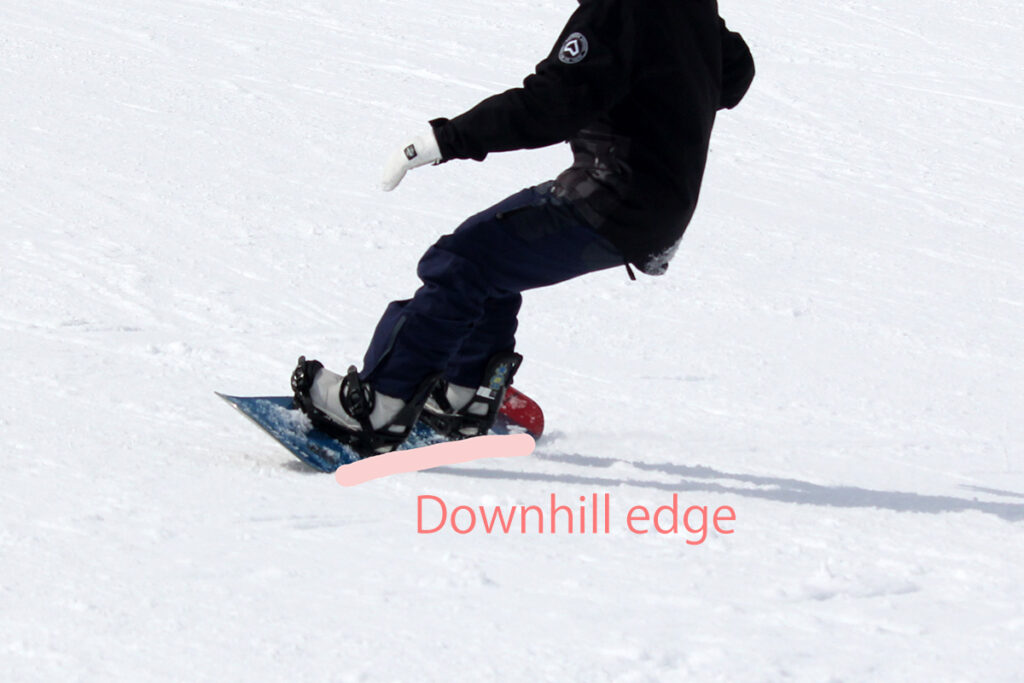
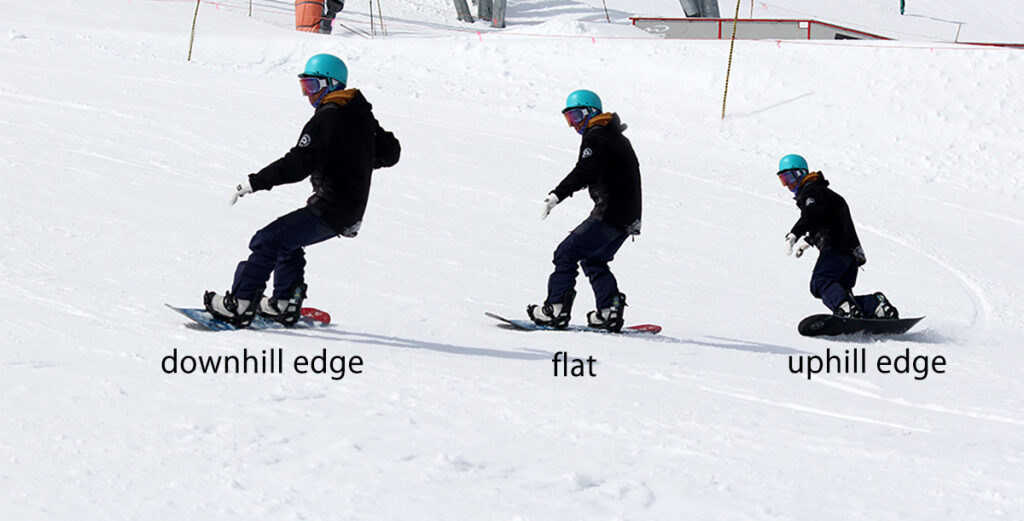
Downhill edge is when the edge of the board is not on the uphill side but on the downhill side. See the photo below for reference.
You may be wondering, “How do I not fall while doing this?”.
It is definitely a trust exercise to be able to perform this; however, the more you practice it, the more you will see that with the right amount of edging and speed, it just so happens that you never end up falling. The board will always be running in your direction of travel.
This downhill edge is the key to a complete carving turn.
For the image below, I finish my toe side turn, then I transition to a flat base, and then I begin my heel side turn by starting on my downhill edge.
Catching an edge, however, can be quite scary as it is a sudden fall if we do not have enough speed. This would leave you with a painful fall.
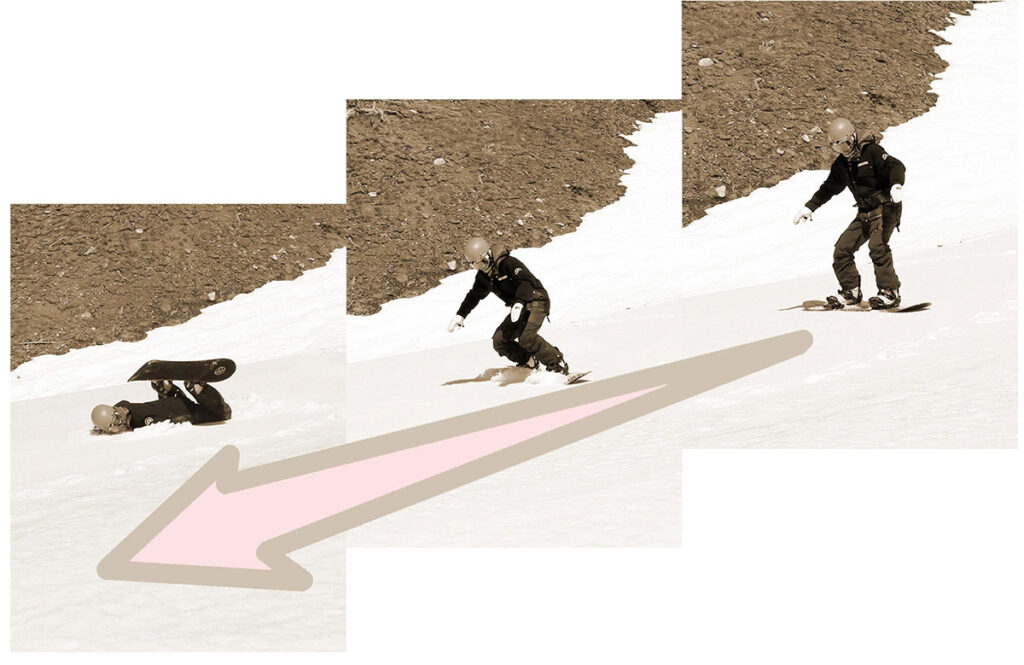
On the carving turn, the board runs in the direction of travel, so it’s okay to tilt the board onto the downhill side.
On the sliding turn, the board is going downwards, so as soon as you get on the downhill edge, it makes sense that you may fall down.
Learn from your mistakes, know that if you are going in the direction of a carving turn, the chances are you won’t fall over. Once you have made a good transition, you know you have completed the carving turn.
As you get used to it, you will feel more comfortable.
I find it most enjoyable when carving on the downhill edge after the edge switch.
After reading this section, you might want to head up the slopes to practice your carving turns, but don’t rush. First, keep practicing your C-turns before you start on S-turns (linked turns).
If you focus on one turn (C-turn), you will get a better understanding of downhill edging.
Toe to heel
When you approach the turn, keep up your speed on the toe side and look across the hill. When you need to change your edge, switch smoothly by looking in the direction you want to go.
Heel to toe
First, keep up your speed on the heel side. When you change the edge take your time. Don’t look into the turn too quickly. I have seen many students looking into the turn too early. You need to be patient. Remember? Snowboards have side-cuts, without steering the snowboard will turn due to the sidecut.
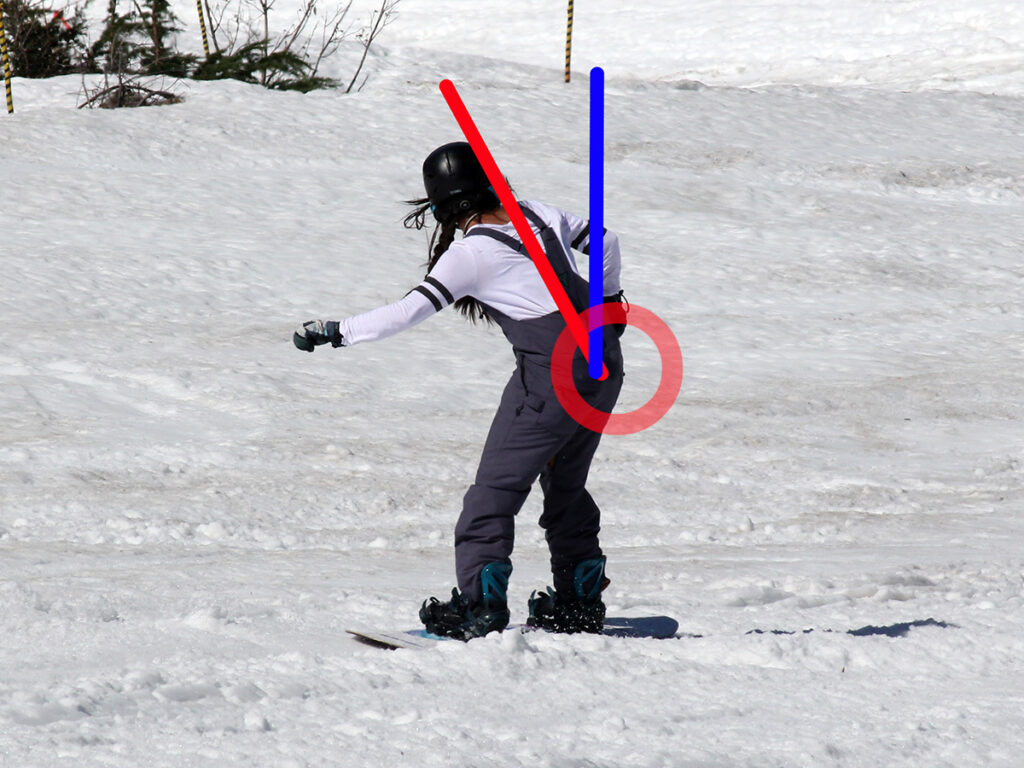
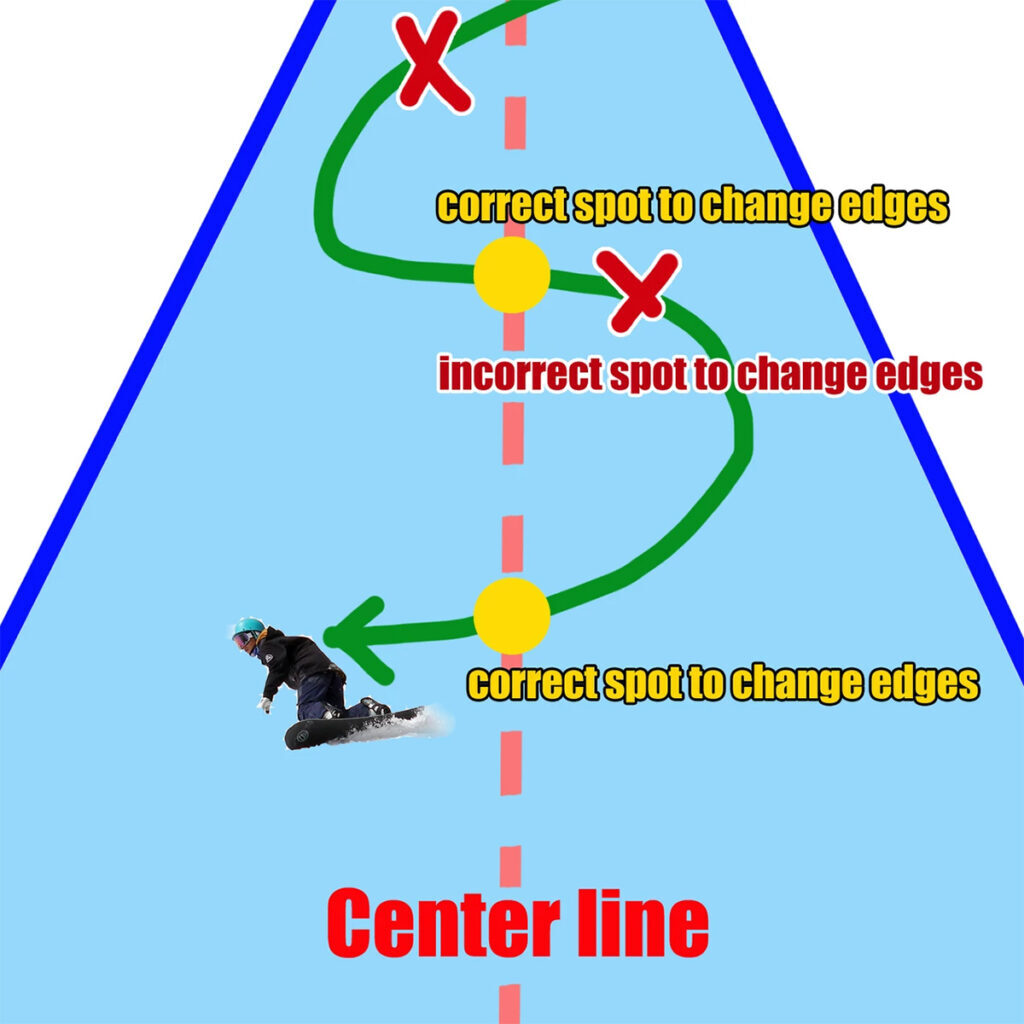
STEP 5 Carved turn completed
Finally the last step! Let’s try a carving turn!!! I would like to tell you where you need to transition edge to edge.
Optimal position to change from one edge to the other edge
The edge transition should be in the middle of your S. Most people tend to change their edges slightly too late and start at the “X” instead of the “yellow circle” like the image below. Make sure to change it right in the center line.
If you understand what we’ve introduced so far, now you can start on a carving turn. Just do it!
First, let’s make a big turn.
Do not force the steering, use the side-cut of the snowboard to turn.
Once you get used to it, increase your edging and put more pressure on the edges to enjoy the carving turn.
Carving Exercise
If you can make a carving turn, please also refer to the following exercises. The quality of your carving turns will be improved.
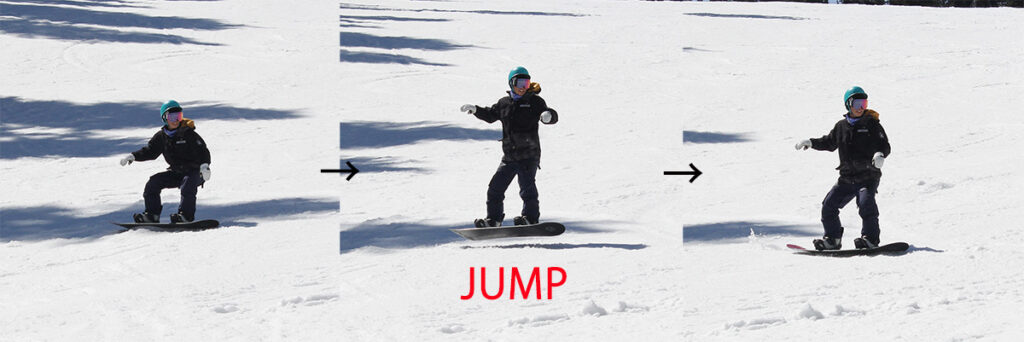
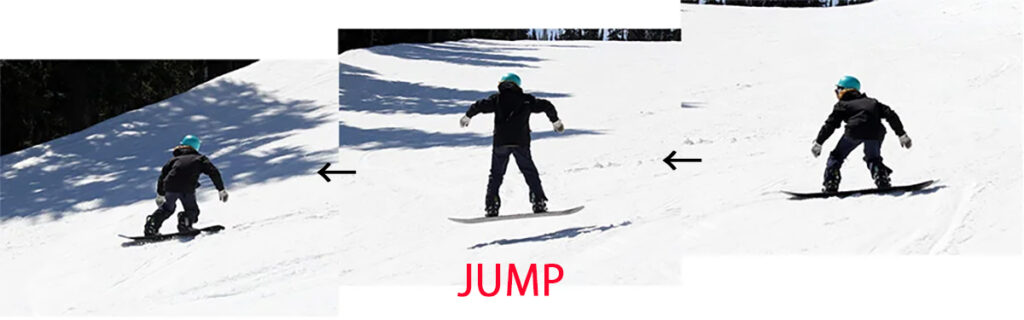
Carving Exercise 1 – Traverse Jump (Improvement of edging)
Let’s jump while traversing to enhance the edging and balance required for carving! If you can’t jump well while on an edge, it’s possible that you’re in a bad posture or you’re not edging well.
Traverse Jump heel side
Jumping on the heel side is quite difficult.
Humans are not accustomed to standing on their heels.
The key is to keep your back as straight as possible and keep your head level.
Be careful not to stick your hips out.
A small jump is OK. Or you don’t have to jump, just make a up and down motion.
Once you get used to it, practice so that you can jump higher gradually.
Be careful not to hit someone who’s riding from above while doing this exercise.
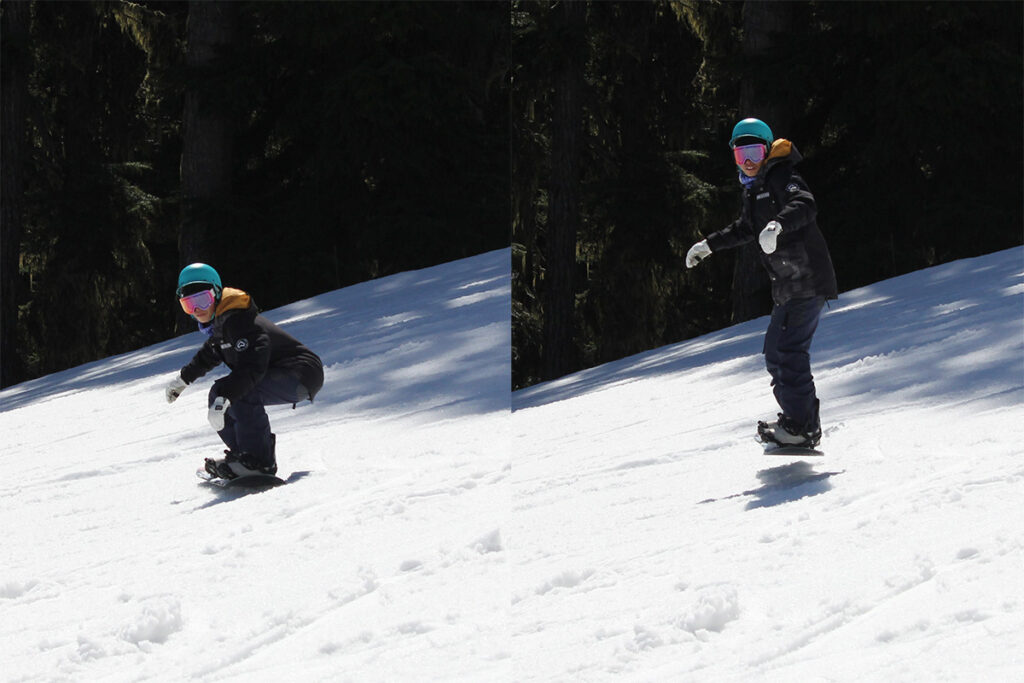
Traverse Jump toe side
It is easier to jump on the toe side than on the heel side.
Keep your back straight, and try to keep your head level.
Keep your upper body upright, then you will get strong edging when you jump.
This exercise uses more physical strength than you think, but it also develops the core muscle strength needed for carving turns.
Let’s try it when you go up to the mountain.
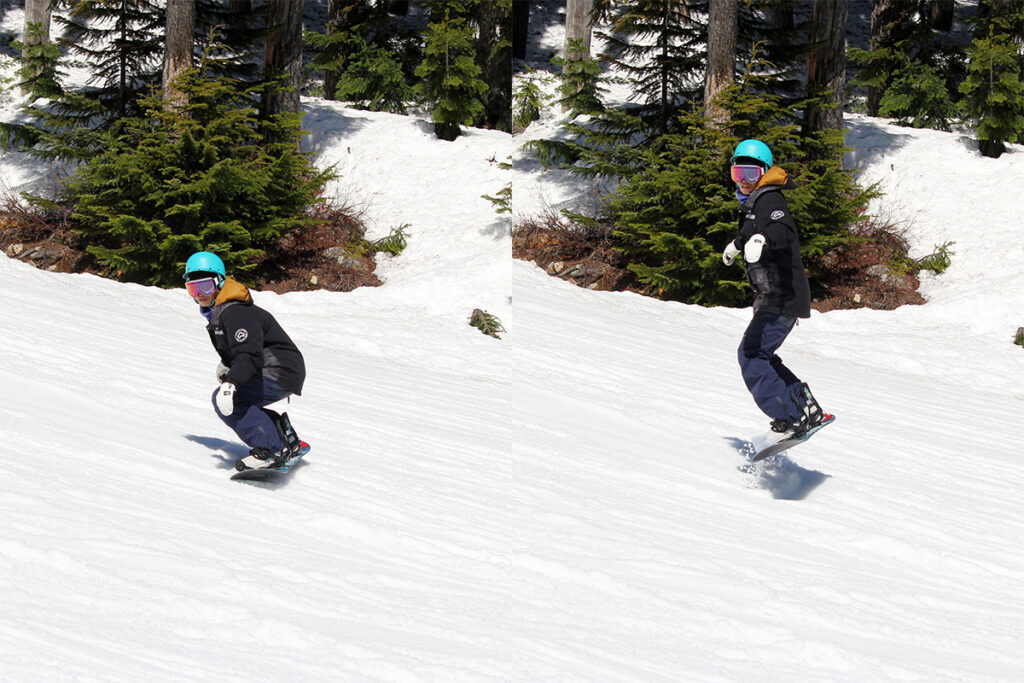
Exercise 2 – Jump when you are stationary on the side of the slope (Improvement of edging)
It is quite difficult to practice jumping when you are stationary.
Jumping on the heel side is a good practice technique because it is difficult to keep your balance.
It will also help strengthen the edging needed on the heel side.
On the toe side, you can feel stronger edging than on the heel side.
Pay attention to keep your upper body upright as your body tends to fall to the mountain side if you lean forward into the snow.
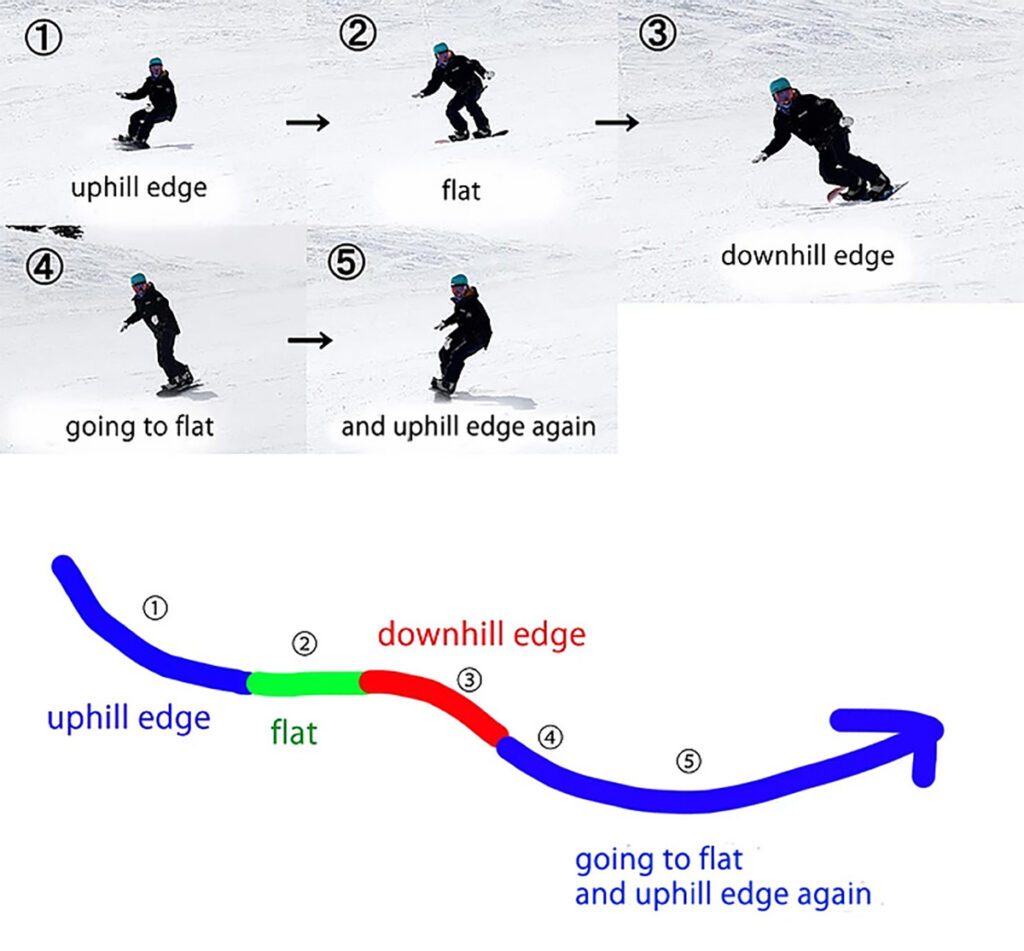
Exercise 3 – Carving Turn Key Downhill Edge Experience when you do Inverse Traverse turns (Improvement of edging ,downhill side)
Inverse Traverse is a practice drill for how to quickly learn to use the downhill edge. From traverse, flatten the board at the transition point and then engage the downhill edge. If you turn as it is, it will be scary and difficult if you are not used to it, so it is a practice method to switch to the uphill side edge again immediately.
If you can make a carving turn, you can experience a more enjoyable world of snowboarding.
Good luck and happy carving!
This season, take the time to practice these steps and exercises, and you’ll soon be mastering the art of carving turns. Remember, every run is a chance to improve, so embrace the process and enjoy the ride.
We can’t wait to see you drawing those beautiful, clean lines on the slopes. Have fun, stay safe, and shred with style!
Fusaki Iida Profile
@fusakidmk
Originally from Tokyo, Japan, Fusaki Iida is a highly experienced snowboard instructor based in Whistler, Canada. With over 40 seasons of snowboarding experience, he has spent decades sharing his expertise through articles, instructional videos, and books.
Fusaki has taught more than 12,000 snowboarders and continues to inspire riders of all levels through his lessons and leadership in one of Japan’s largest snowboard communities. His dedication to snowboarding earned him the MVP award for Whistler instructors in the 2016-17 season.
Passionate about helping others enjoy the sport, Fusaki is committed to making snowboarding accessible and fun for everyone.