
Ollie is a basic freestyle trick for snowboarders. Learning ollies will allow you to jump across the various terrains of the ski area. With ollies, its possible to get more airtime when you jump.
If you want to get better at ollies, let’s do the 6 steps I will introduce!
Rider: Jimmy https://www.instagram.com/aka_jimmy/
目次
Step 1 : Practice without a snowboard
First, let’s understand the movement of ollie without a snowboard. This practice can be done at home too. Practice as many times as you like to understand the correct ollie movement with your body.
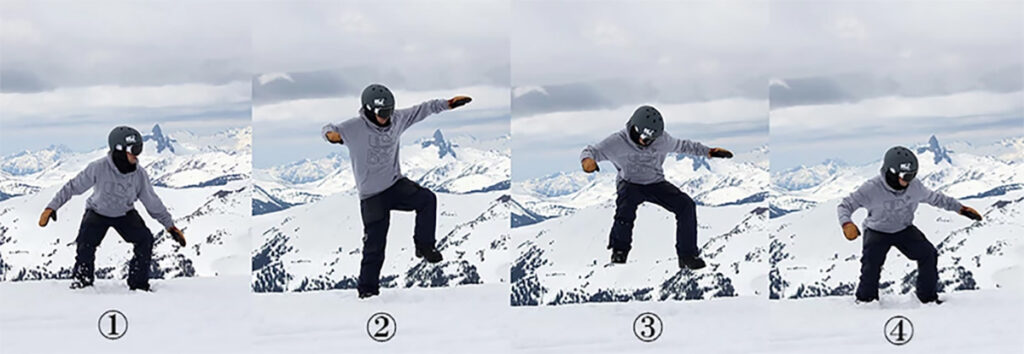
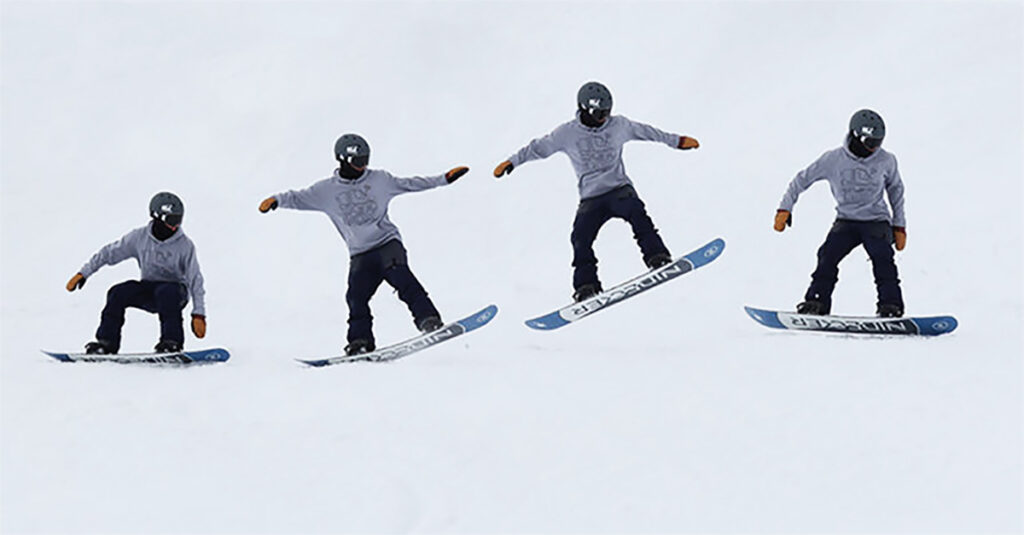
① Bend your ankles and knees and take a low position
② Raise your front knees, push down on your back leg and jump
③ suck in both feet towards your chest
④ When landing, bend your knees and land softly like a cat
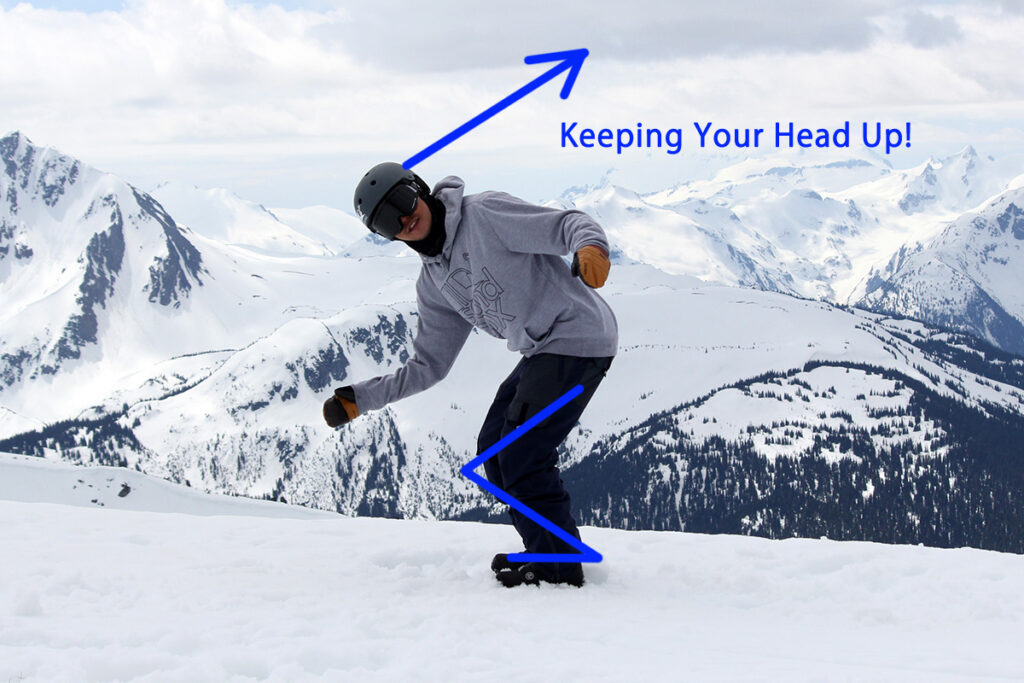
Common mistakes: Head down
Some people keep their heads down/lean their heads to the toe side when they bend their knees and ankles. You want to bend your ankles and knees, but don’t keep your head down as it will affect your balance.
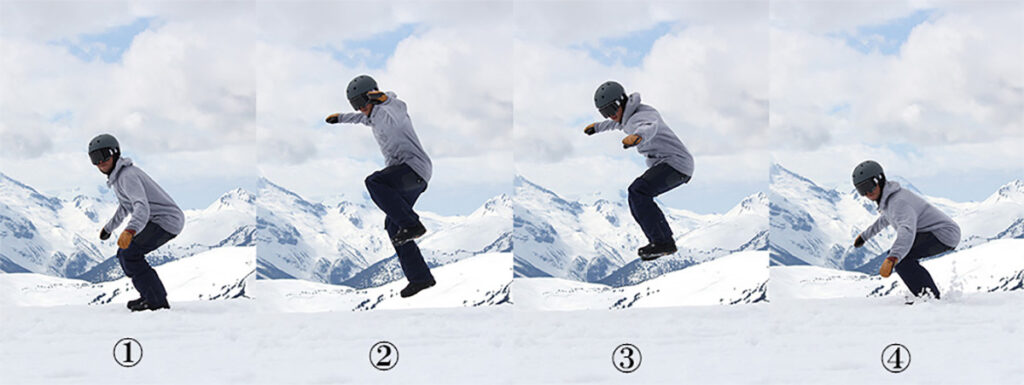
Step 2 : Find flat area, let’s practice with a snowboard
This time, let’s go with the board actually attached. There are flat areas in the ski resort, such as the area near the restaurants and near the chair lifts. It’s easier to do ollies when your board is stationary than when it’s done while the board is moving. So, first of all, let’s make sure that you can ollie firmly in such a simple environment.
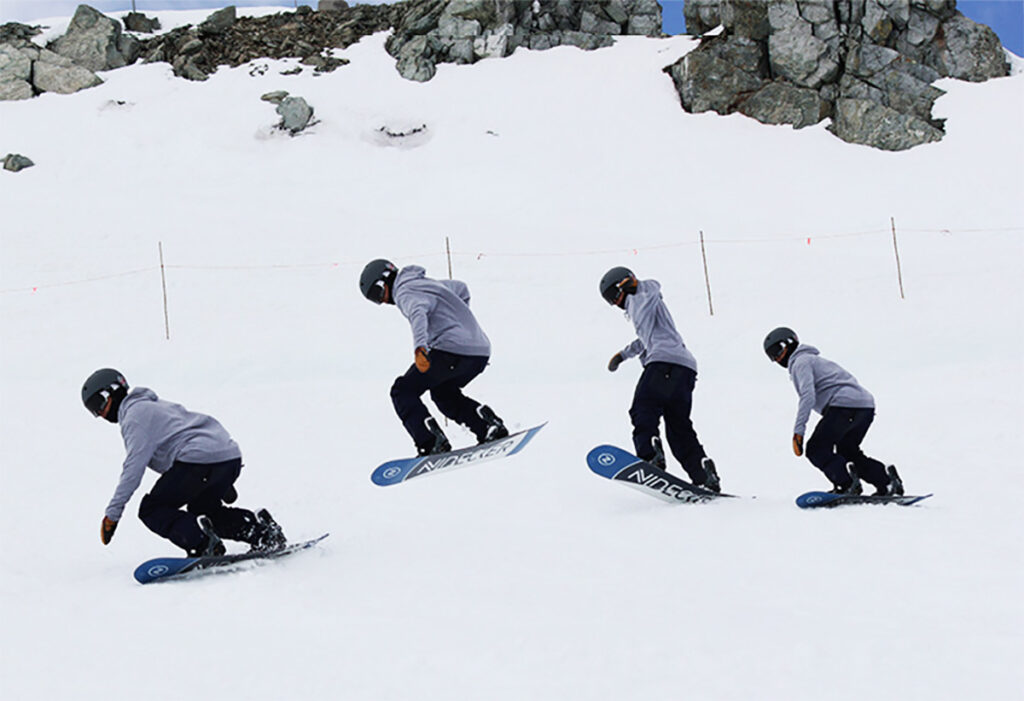
① Let’s put some weight on the front leg
② Move your weight to your back legs like rowing a boat and press down with the tail of the snowboard
③ Pull both feet toward your chest and jump
④ Absorb the impact with your knees like a cat and land
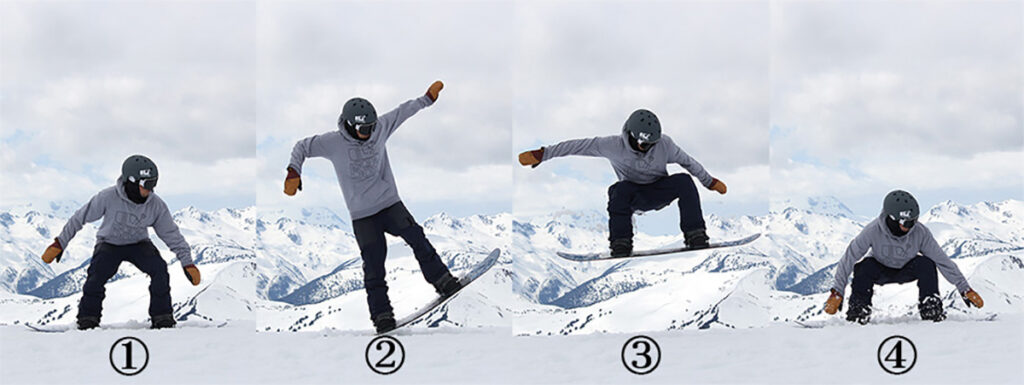
Step 3 : Ollie at slow speed
Now let’s try the ollie while riding. At this time, the important thing is to do it at a low speed. The higher the speed of the snowboard when you try to ollie, the more difficult it is to execute this movement. So at the beginner’s stage, the slope is as flat as possible. It is preferable to do it in a place where the speed is not so high.
If you cant ollie well, it is important to do in a simpler environment. It is important to be able to do the ollie motion correctly before you progress to tougher terrain. For example, a gentle place where you start riding, a place that is almost flat near the lift platform and does not speed up, or a Cat Track(narrow and flat long run) is a good place to start.
It’s more difficult than the one I introduced earlier in Step 2, but let’s try to do it even where we can gradually increase the speed. As I say many times, practice is important. Some beginners say, “I can’t do it well.” However, if you can imagine the correct movement, it is important to repeat the practice.
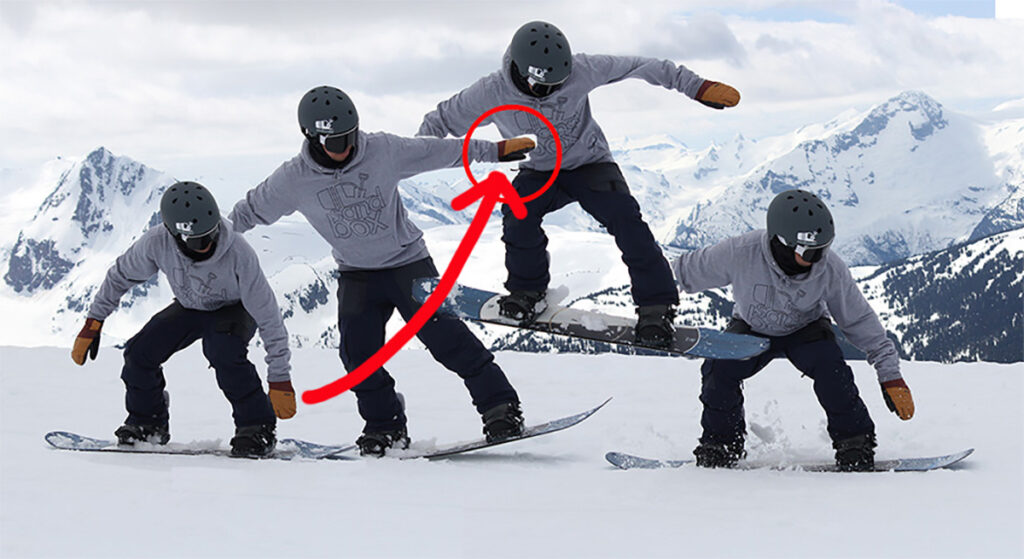
Guide the ollie by using your front hand to match the movement of the board. Your front hand will be close to your front shin in the starting position, move your front hand upwards as you press down on the tail of the snowboard. However, at this time, if the front hand rises too much you might losing balance. Raise both hands to shoulder height and not any higher.
Step 4 : Ollie over obstacles
Go over a small obstacle, while doing an ollie.
Jumping some obstacles makes it easier to ollie. The obstacles are, for example, snowballs and tree branches. It will be easier to make an ollie jump if you have a little pressure to “fly” and avoid the object in the snow. If you get off-balance with this exercise, try going back to the previous step and reviewing what went wrong. The important thing is to do each step correctly to maximize your ollies air time.
STEP 5 Ollie going off a small ledge
After completing step 4, you should be able to improve your ollie considerably. For Step 5, let’s Ollie going off a small ledge.
Ridges can be found where you jump off a Cat Track(flat and narrow long run). Be sure to check that the landing is safe and clear of other people before you ollie off the ledge.
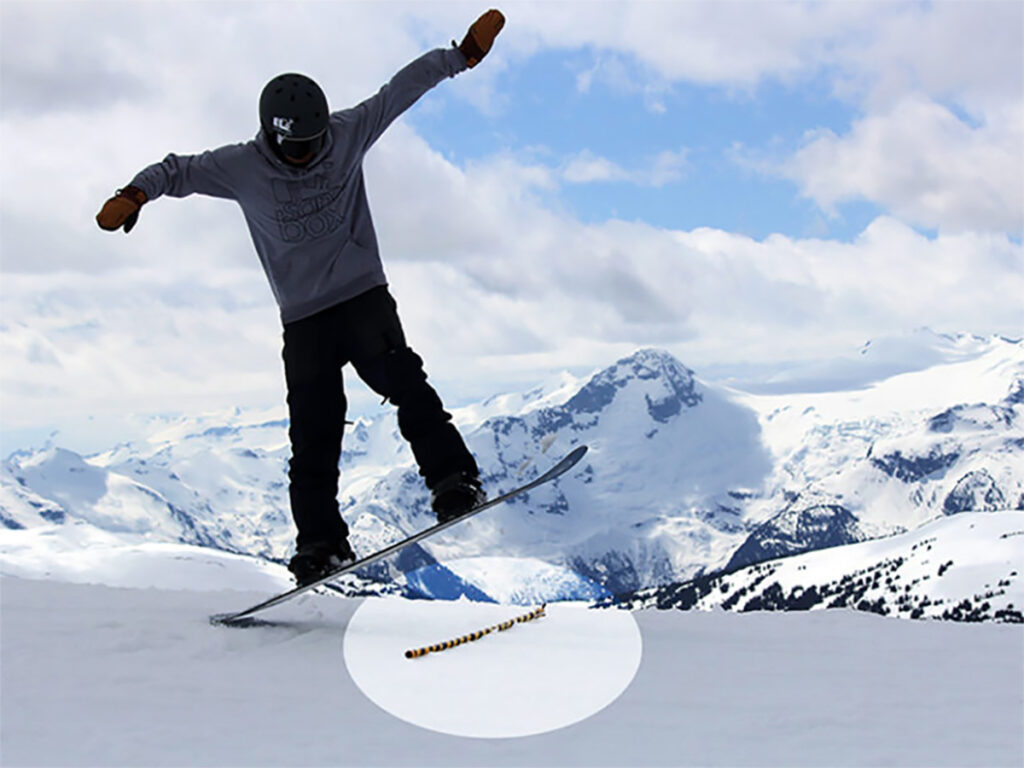
KEY POINT: The key to getting a decent height when doing an ollie is to wait until the lip of the ledge is barely reached.
What you want to learn in step 5 is to wait as long as you can when popping. This is because many Ollie beginners can’t get enough air without waiting. If you pop too early, you wont jump very high. Look at the image below to see when you should press down on the tail of the snowboard to get a maximum height when doing an ollie.
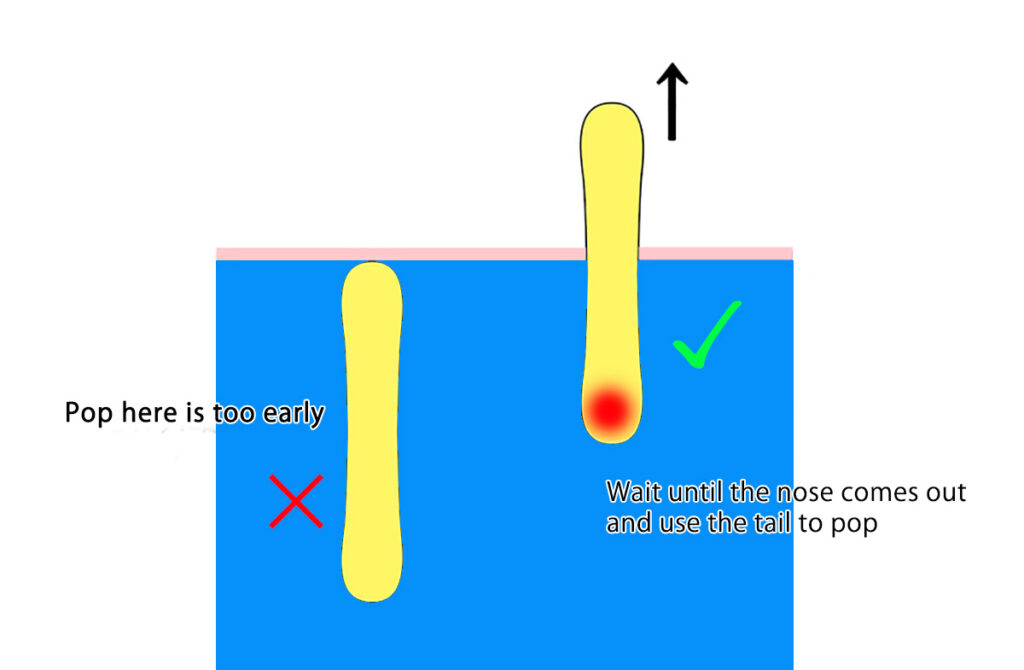
If you’re not used to it, it is ok to pop early to reduce the height you are jumping, but gradually strengthen your feeling of “waiting” and try it. If you could wait and do the ollie when the nose of the snowboard is not touching the snow, you can fly a lot higher. In the illustration above, let’s try pushing the red ● part to the ground like a push button.
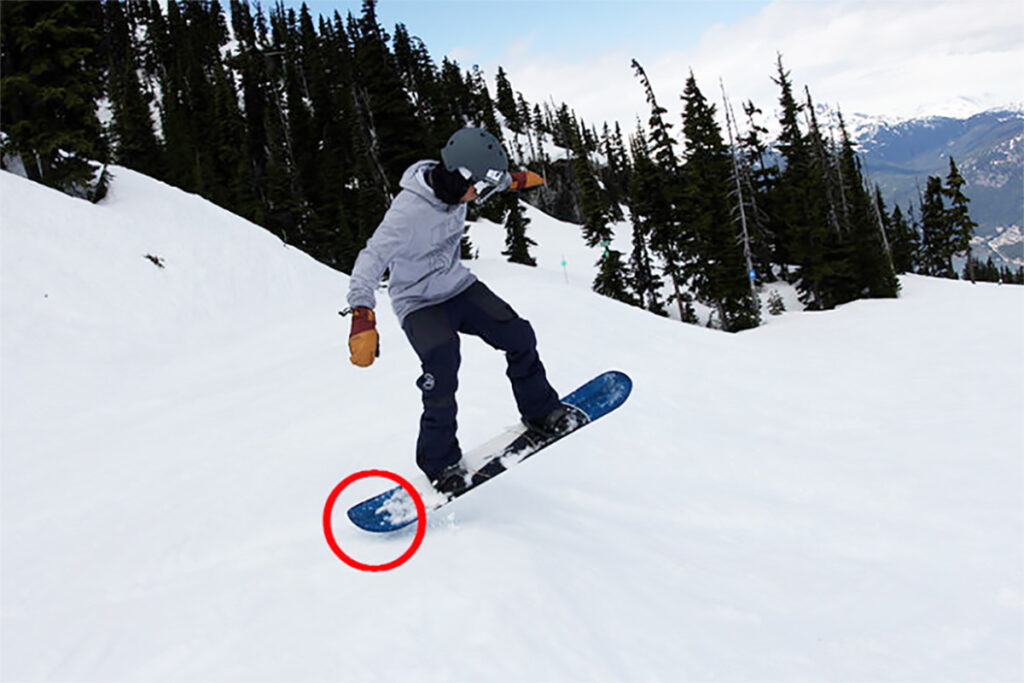
The key to ollie is whether you can use the tail of the snowboard to pop.
STEP 6 : Ollie off the edge of your snowboard
Ollie is a technique that can be used in various areas of ski resorts. You can also do a side hit jump. In places like side hits, you will also need a slight heel/toe side before beginning your ollie. Therefore, in Step 6, I will introduce an ollie exercise while you traverse across the slope.
Heel side traverse Ollie
Humans can stand on their toes, but it is difficult to stand on their heels. So heel-side ollie is difficult to keep your balance. If you can’t do it well, discard the ollie movement at first and use the heel side edge to jump with both feet at the same time. Once you get used to it, let’s put in an ollie style that kicks with the tail.
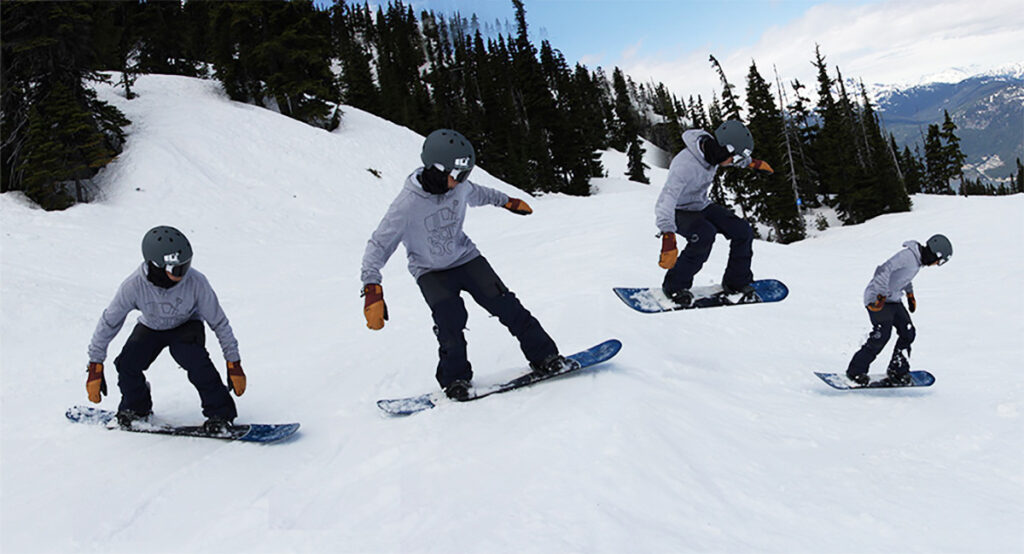
Toe side traverse Ollie
The toe side, which is easy for edging, is easier to ollie than the heel side because you have an extra joint in your ankles. However for toe side ollies, it is easier to fall when you land on your toes, so try to keep your upper body straight.
Please check out the video below, too!